
My Canadarm3
In this activity, you will design and build your own Canadarm3 while exploring how arms bend in different ways and at different spots on the arm (elbow, shoulder, wrist, fingers) and what the purpose and different abilities allow us to do.

Text version of infographic entitled "The engineering design process"
The engineering design process
- Problem or challenge
- Define the problem
- Identify the constraints on your solution (e.g. time, money, materials) and criteria for success
- Brainstorm multiple solutions for the problem
- Select the most promising solution
- Prototype your solution
- Test and evaluate your prototype
- Iterate to improve your prototype
- Communicate your solution
Infographic entitled "The engineering design process". (Credit: Canadian Space Agency [CSA])
Define
Have you ever thought of how our arms move and how they help us do important things like eat, brush our teeth, play games, participate in sports, and do so many amazing things? What is the best thing your arm and your hand allow you to do?
Now imagine if we couldn't bend our arms, or move our wrists, or have hands with fingers. How would life be different? What are the different body parts that we have as humans that allow our arms and hands to be so useful?
Robots are very different from humans, and they can be very helpful to us when we design them properly. We have muscles that help us move our arms; robots have motors. Humans have a nervous system that helps tell the muscles when to move; robots have wires. We have brains that help control our bodies and help us decide why and how we should move. Robots have a computer and a computer program that tells them what to do and how to do it.
Over 40 years ago, in , Canadian engineers made a very important robotic arm we called the Canadarm. This robotic arm was the first of its kind to go to space and was a part of the now retired space shuttle program. Since that time Canadian engineers have been able to make many improvements to our world-famous robotic arm.
When we take a close look at the Canadarm, we can see that it has the shape of a human arm and can rotate at the elbow area. Move your arm around – what movements can you make? Which ones are more difficult? Which movements are limited, and which ones can you not make?
Are there animals that can move differently? What are their range of motions, and do they have different limitations than humans? Also consider the abilities of other animals and their limbs and their function and purpose (e.g. human vs. dog vs. T-Rex).
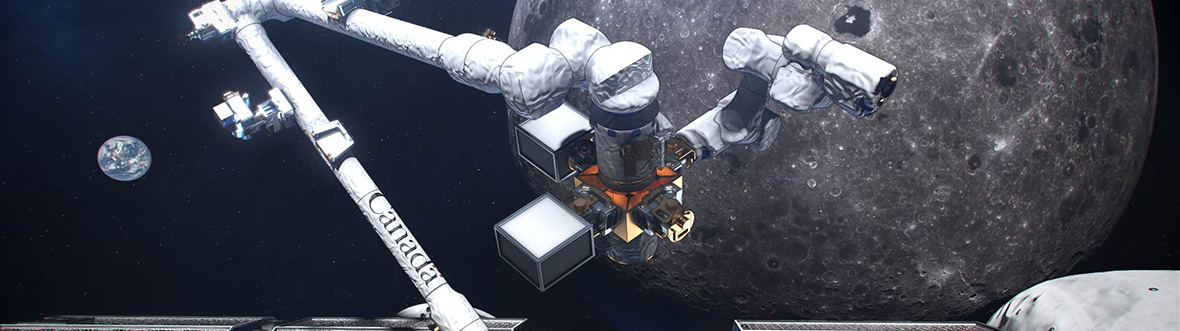
Did you know that Canada is an expert in space robotics? Our country will provide Canadarm3 to Gateway, but we also built Canadarm2 for the International Space Station (ISS) and the original Canadarm for the space shuttles, which are now retired. This chart compares the three robot arms.
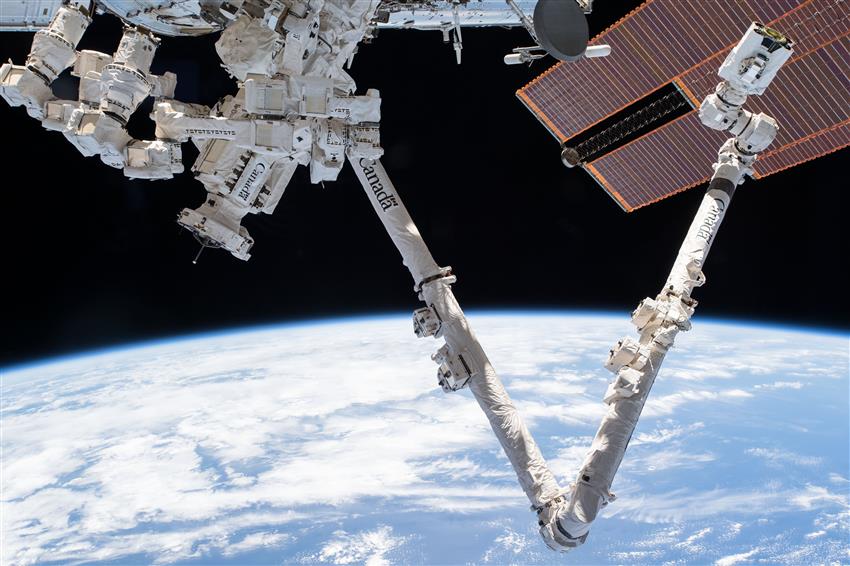
Canadarm2 (right, in the shape of a "v") and its robot friend Dextre (top left) on the ISS. (Credit: NASA)
The Canadarm3 system on Gateway will consist of three different parts: a large arm, a smaller more agile arm, and a tool and on-orbit replaceable unit caddy. Each will be doing a different job, and together they will play many roles like a real human arm – upper arm, elbow, wrist, and hand. The robotic arms will be doing very important tasks on Gateway including moving things around and helping with repairs.
Using simple materials like cardboard and string, how can you engineer a robotic arm that can move in at least one way?
Identify
What should you keep in mind when designing and building your Canadarm3?
Suggested materials
- Pencils, pencil crayons, crayons, or markers
- A choice of wood sticks, pencils, straws, or straight branches or twigs
- Cardboard, construction paper, or empty cereal box
- Fasteners (elastics, binder clips, brads, pipe cleaners, string, tape, glue, or homemade glue)
- Scissors or cardboard cutters
- Hot glue gun (optional)
- Graph paper or regular paper
- Any repurposed materials you have on hand (plastic bottles, egg cartons, straws or rolled-up recycled paper to make a tube, Popsicle sticks, small twigs, rocks, etc.)
- Variety of paints, coloured paper, tinfoil, or any other materials available to make your arm look awesome!
- Optional: Lego, K'NEX blocks, KEVA blocks

Text version of infographic showing a few cardboard cutting and folding techniques
A few cardboard cutting and folding techniques
- Flange
- L-brace
- Tabs
- Slot + cut
- Slot + tab
- String
A few cardboard cutting and folding techniques. (Credit: CSA)
Brainstorm
How can we build a robotic arm that can move and bend in at least one spot? What materials can be used to create movements? How many parts will move on your arm? What are the different parts you would need for your arm, and how will you make them move?
Select
After brainstorming with your friends, family, or teacher, choose an idea you liked and try to draw your design before you try to make it. Be sure to label all the different parts of your design.
Prototype
- Design the first straight piece of your arm using any available materials.
- Design the second straight piece of your arm using any available materials.
- Figure out what the pivot point will be and what materials you will use to make it movable. Hint: Make sure you don't glue this part down and make it too tight, as it needs to be able to move.
- Using any method or material you have available, connect the end of the first part of your arm to the end of the second part.
- What will you use to make your arm move? Will you pull on a string to move it in one direction and a different string to pull it back in the other direction? Or will you use elastics to bring it back after moving? The choice is yours! Be creative!
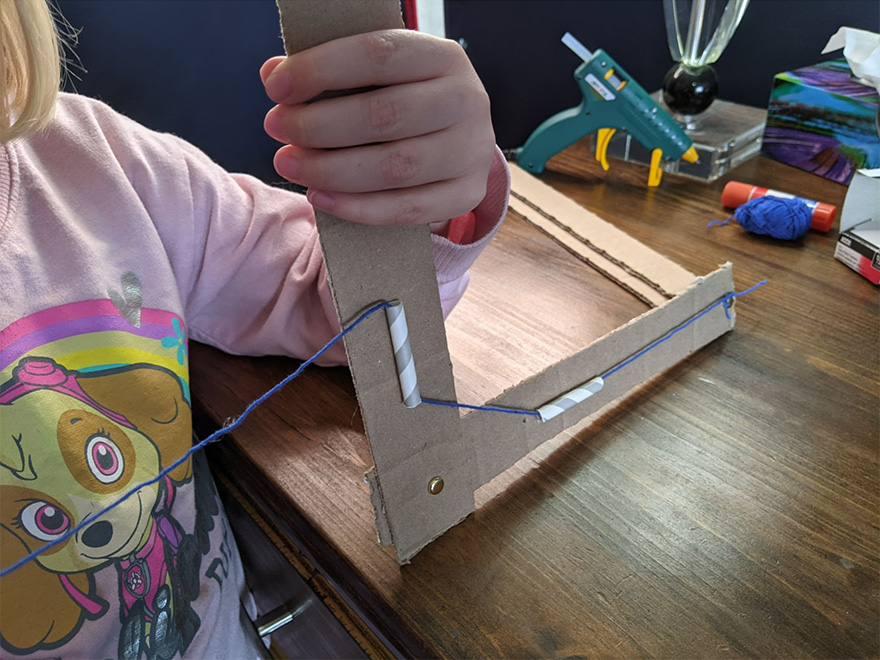
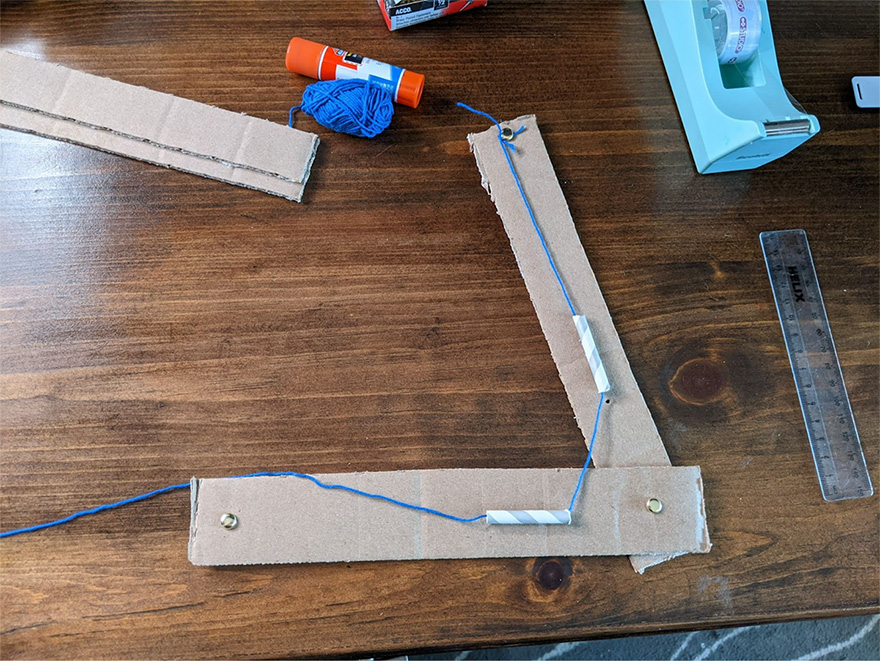
Examples of an arm design using cardboard, string, straws and fasteners – and lots of imagination! (Credit: CSA)
Test
- Did your arm move the way you wanted? If not, what happened and does it need to be changed?
- What part of your robotic arm moves?
Iterate
- How can you build it with less material?
- Could you add extra parts for it to move better?
- How could you add more parts to make your arm move in different directions?
- Are there things you'd do differently if you had more time?
Communicate
- What are the highlights of your robotic arm? Is there something about it you are really excited about?
- Share your project with us. Ask an adult to share a picture on social media and tag the CSA. You never know: a real astronaut might see your creation.
Taking it further
- Can you add extra moving parts to your arm?
- Can you design a paper circuit using LEDs and copper tape to help light up your cardboard arm?
- Can you add a small servo motor using a micro:bit and code it to make it move?
Curriculum links
- Design thinking and the engineering design process
- Critical thinking, problem solving, communication, and collaboration
- Science:
- Simple mechanisms
- Space
- Forces
- Health:
- Dexterity, muscles and body movements
- Math:
- Standard or nonstandard measurement
- Number sense
- Introduction to angles (pre-geometry)
- Technology:
- Robotics